Did you know that over 30% of temporary resident applications get delayed due to incomplete paperwork? Proper documentation is the backbone of a successful submission. Whether you’re applying online or through paper forms, having the right files ready saves time and stress.
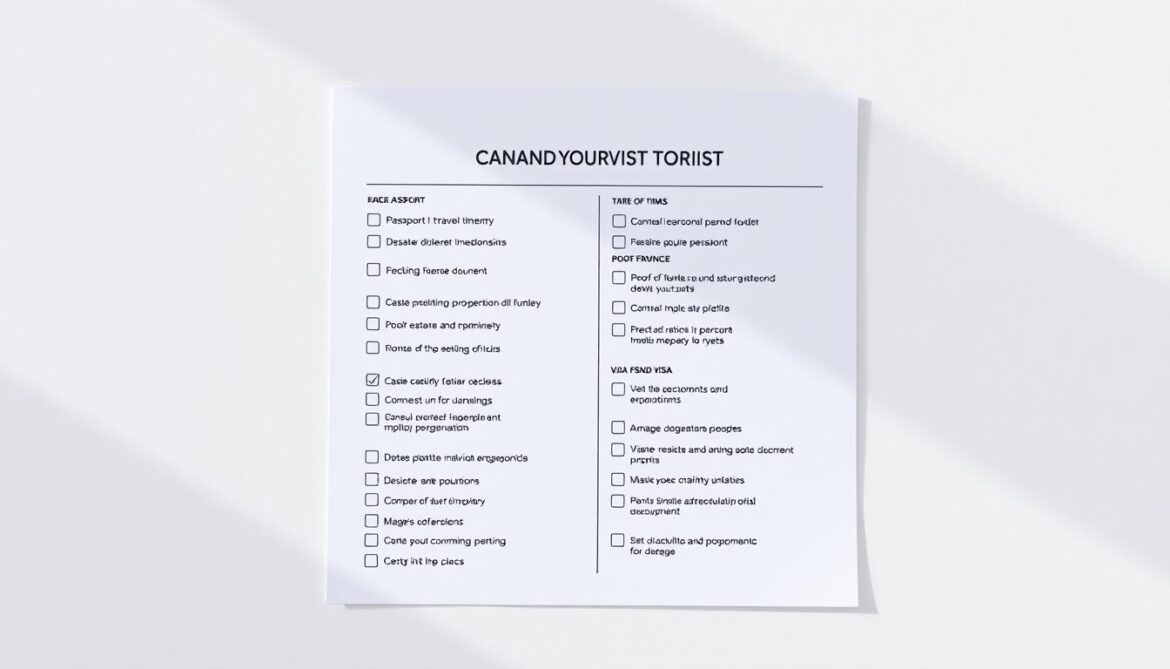
The Canadian government updates requirements regularly, and the 2024 guidelines now include stricter validity rules for financial proofs and translations. You can download the official IMM 5484 checklist (PDF, 1.3 MB) directly from the Canada Visa Portal to stay current.
Many applicants struggle with medical examination requirements for extended stays or dual application options. Avoid common mistakes by verifying each document meets the latest standards before submitting.
Understanding the Canada Tourist Visa (Temporary Resident Visa)
Planning a short-term stay in Canada starts with understanding entry requirements. The Temporary Resident Visa (TRV) serves as official proof that you meet admission criteria for visits under six months. Unlike an Electronic Travel Authorization (eTA), which is for visa-exempt travelers, a TRV is mandatory for citizens of non-exempt countries.
What Is a Temporary Resident Visa (TRV)?
Under the Immigration and Refugee Protection Act, a TRV is a counterfoil or electronic document issued by Immigration, Refugees and Citizenship Canada (IRCC). It confirms you’ve passed preliminary checks but doesn’t guarantee entry—final approval rests with a border services officer upon arrival.
Who Needs a Tourist Visa for Canada?
Citizens of over 50 countries—including the U.S., U.K., and Australia—only need an eTA. Others must apply for a visitor visa. Special cases include:
- Refugees or stateless persons requiring temporary residency permits
- Non-citizens with passports from unrecognized states
Overstaying your visa validity can lead to deportation or future entry bans. Always verify your family members’ eligibility, as definitions vary under Canadian law.
Types of Canada Tourist Visas
Choosing the right travel permit depends on your itinerary and needs. Each type has unique rules for entry frequency, duration stay, and geographic limits. Below are the three main categories available.

Single-Entry Permit
This option allows one-time entry within its validity period. Once you leave, re-entry requires a new application. Ideal for short trips with fixed return dates.
Geographic restrictions apply—some permits limit travel to specific provinces. Costs are lower than multi-entry options, but weigh this against potential future trips.
Multiple-Entry Permit
Frequent travelers benefit from this flexible option. With validity up to 10 years, you can enter repeatedly during its lifespan. Each stay typically caps at six months.
“A multiple-entry permit saves time and money for those visiting family or conducting business regularly,” notes an immigration advisor. Fees are higher upfront but cost-effective long-term.
Transit Permit
Required if you’re passing through to another country, like the United States. Holders must depart within 48 hours and show proof of onward travel.
Exceptions exist for layovers involving direct routes to Saint-Pierre and Miquelon. Airlines often verify transit documents before boarding, so ensure yours meets requirements.
Eligibility Criteria for a Canada Tourist Visa
Your ability to visit depends on meeting three critical criteria set by authorities. Each requirement ensures you can support yourself during your stay canada and intend to return home afterward.
Proof of Financial Stability
You must show sufficient funds to cover your trip. The Low Income Cut-Off (LICO) table determines minimum amounts based on family size. Acceptable documents include:
- Bank statements showing 6 months of transactions
- Sponsorship letters with the sponsor’s work study or income proof
- Investment records or fixed deposits
“Applicants often underestimate seasonal cost variations,” warns an immigration consultant. Account for higher expenses in winter months.
Ties to Your Home Country
Strong connections to your home country reduce concerns about overstaying. Evidence includes:
- Property deeds or rental agreements
- Employment contracts with approved leave
- Enrollment letters for dependents in local schools
Border officers prioritize applicants with stable jobs or businesses. Self-employed individuals should provide tax filings.
Health and Character Requirements
A clean criminal record and good health are mandatory. Agricultural workers may need a medical examination. Key steps:
- Obtain police certificates from all countries lived in for 6+ months
- Complete biometrics if required
- Declare any past visa refusals honestly
Processing delays occur if documents expire mid-application. Renew passports and certificates beforehand.
Canada Tourist Visa Document Checklist
Missing even one document can delay your approval by weeks or months. The IMM 5484 form outlines current requirements, but here’s a breakdown to simplify your preparation.

Mandatory Documents for All Applicants
Every submission must include:
- A valid passport with at least 6 months’ validity
- Two recent photos meeting 50x70mm specifications
- Completed application forms (IMM 5257 for most visitors)
- Proof of paid processing fees
“Applicants often forget travel history details,” says an immigration consultant. Include past visas or entry stamps from other countries.
Additional Documents for Specific Cases
Special circumstances require extra paperwork:
- Minors: Notarized consent letters from both parents
- Non-English/French documents: Translations by a certified translator with seals
- Family visits: Invitation letters with host’s address and financial commitments
| Item | Specification |
|---|---|
| Photos | 50x70mm, neutral background, no shadows |
| Translations | Must include translator’s credentials and contact details |
| Digital Uploads | PDF or JPEG under 4MB, clear scans |
Keep copies of all submissions for 12 months. Authorities may request verification during processing.
How to Gather Your Supporting Documents
Gathering supporting files involves more than just collecting papers—it needs validation. Authorities scrutinize every detail, from translations to financial proofs. Follow these steps to ensure your submission meets standards.
Translations and Certified Copies
All non-English French documents must be translated by a certified translator. IRCC accepts only accredited professionals with seals. Key rules:
- Translations must include the translator’s credentials and contact details.
- Affidavits are required for non-professional translations (e.g., from family members).
- Certified copies of original documents must bear a notary’s stamp.
“Digital notarization is now accepted for international applicants,” notes an immigration advisor. Check provincial authorities for approved services.
Validating Financial Proof
Bank statements and income proofs must be authenticated. Follow these steps:
- Ensure statements cover the last 6 months with clear transaction details.
- Convert foreign currencies to CAD using official exchange rates.
- Self-employed applicants should provide tax filings and business licenses.
Police certificates must be recent—typically issued within 3 months of submission. Delays occur if they expire during processing.
Completing the Application Form (IMM 5257)
Errors in your application form can lead to unnecessary rejections or extended wait times. The IMM 5257 requires precise details—minor inaccuracies may trigger additional reviews. Follow these steps to ensure seamless processing.

Step-by-Step Form Instructions
1. Personal Information
Enter your name exactly as it appears in your passport. Middle names are optional but recommended for consistency.
2. Travel History
List all international trips in the past 10 years. Include destinations, dates, and purposes. Gaps may raise questions.
3. Employment & Financial Details
“Self-employed applicants often omit business registration proofs,” notes an immigration expert. Attach tax filings if applicable.
Common Mistakes to Avoid
Inconsistent Signatures
Digital signatures must match your legal name. Handwritten signatures on printed forms require black ink.
Overlooking Dependent Children
Even if they’re not traveling, list all children under 22. Provide birth certificates for verification.
Previous Visa Refusals
Disclose all prior rejections honestly. Concealing this triggers automatic bans under immigration law.
Use IRCC’s online validator before submitting. Corrections post-submission delay processing by weeks.
Preparing Your Biometrics
Biometrics are a mandatory step for most applicants, ensuring secure identity verification. This process includes fingerprinting and a photo, valid for 10 years. Exceptions apply to certain age groups and diplomatic passport holders.
Biometrics Fee and Appointment
The current biometric fee is $85 per person. Families applying together may qualify for reduced rates. Use the official visa application centre locator tool to book slots.
Key steps to schedule:
- Check available time slots—appointments fill quickly during peak seasons.
- Bring original ID (passport) and your payment receipt.
- Arrive 15 minutes early to complete security checks.
What to Expect During Your Appointment
The process takes about 30 minutes. Officers will:
- Capture all 10 fingerprints digitally.
- Take a high-resolution photo with neutral expression.
- Verify documents against your application.
“Data encryption protects your information during transit,” assures an IRCC representative. Rescheduling is allowed if you miss your slot, but delays may occur.
Children under 14 must accompany parents but only provide photos. Those over 79 are exempt from fingerprints.
Paying Your Visa Fees
Paying the required fees marks a critical step in finalizing your submission. Incorrect payments or missing receipts can delay processing times by weeks. The 2024 fee structure includes fixed rates for applications and additional charges like the biometric fee.
Fee Structure for 2024
Current fees are non-refundable once processing begins. Here’s the breakdown:
| Fee Type | Amount (CAD) |
|---|---|
| Application Fee | $100 |
| Biometrics Fee | $85 |
| Family Bundle (2+ applicants) | Discounted rates apply |
“Diplomatic passport holders and certain official visitors may qualify for exemptions,” notes an IRCC bulletin. Always verify eligibility before submitting.
Payment Methods Accepted
Choose from these secure options:
- Online Portal: Credit/debit cards (Visa, Mastercard, Amex).
- Bank Drafts: Must include your application number.
- Certified Cheques: Payable to “Receiver General for Canada.”
Save payment receipts digitally and physically. Authorities may request them during processing times or at biometric appointments.
Submitting Your Application
The final step before processing begins requires careful attention to submission methods. Whether you apply online or via paper, each option has distinct advantages. Timeliness and accuracy directly impact your approval timeline.
Online vs. Paper Application
Digital submissions through the Canada Visa Portal are faster, with most approvals within 14 days. Key benefits include:
- Auto-save functionality prevents data loss during interruptions.
- Real-time validation flags missing fields before submission.
- Document uploads accept PDFs or JPEGs under 4MB.
Paper applications suit those outside Canada with limited internet access. Required mailing addresses vary by region:
| Method | Processing Time | Best For |
|---|---|---|
| Online | 10–14 days | Urgent travel, tech-savvy applicants |
| Paper | 30+ days | Remote areas, complex cases |
Using the Canada Visa Portal
Create an account with a verified email to start your visa application. The portal’s notification system alerts you to:
- Biometrics requests
- Document deficiencies
- Approval updates
“Courier tracking is mandatory for paper submissions,” advises an IRCC representative. Always retain submission confirmations for reference.
After Submission: Tracking Your Application
Once your application is submitted, tracking its progress becomes crucial for timely updates. Delays often occur due to incomplete follow-ups or missed requests. Stay proactive to ensure smooth processing.
![]()
Processing Times by Country
Wait periods vary by region. For example, applicants from India typically wait 14–30 days. Factors influencing timelines include:
- Peak seasons (summer, holidays)
- Backlogs at border services offices
- COVID-19 related staffing shortages
“Always check IRCC’s website for real-time updates,” advises an immigration consultant. Compare your timeline against averages to gauge delays.
How to Respond to Additional Requests
Authorities may ask for extra documents or medical exams. Key steps:
- Log into your GCKey account immediately.
- Submit requested files within 7–10 days to avoid closure.
- Use certified couriers for physical submissions.
For overdue applications, escalate via IRCC’s web form. Include your application number and submission date.
Preparing for Your Trip to Canada
Crossing the border smoothly requires careful preparation and the right documents. Authorities verify your eligibility to ensure compliance with entry rules. Keep all paperwork accessible to avoid delays.
Port of Entry Requirements
At the port entry, a border services officer will review your:
- Valid passport and visa (if required)
- Proof of funds for your stay canada
- Return ticket or onward travel confirmation
Declare currency over CAD 10,000 using the customs form. COVID-19 vaccination proof may still be requested for certain travelers.
What to Carry When You Travel
Pack these essentials in your carry-on:
- Printed copies of accommodation bookings
- Medication with original prescriptions
- Contact details for your destination host
“Secondary inspections occur if documents raise concerns,” notes an immigration expert. Stay calm and answer questions truthfully.
Extending Your Stay in Canada
Life happens—sometimes you need more time than originally planned. Whether it’s for family, work study, or unexpected events, extending your visit requires timely action. Authorities prioritize applications submitted at least 30 days before your current status expires.

When and How to Apply for an Extension
Submit your request online via the IRCC portal or by mail. Key steps include:
- Paying the $100 fee (per person) plus biometrics if required
- Providing proof of funds for your extended stay canada
- Attaching a letter explaining the reason for your extension
“Implied status lets you remain legally while your application processes,” notes an immigration advisor. Avoid traveling during this period—re-entry isn’t guaranteed.
Maintaining Legal Status
Overstaying risks future entry bans. If your status expires, you may qualify for restoration within 90 days. Requirements include:
- Proof you applied to leave canada before your permit lapsed
- Updated medical coverage (mandatory for extensions beyond 6 months)
- Employment authorization if continuing work study
Border officers may request proof of ongoing ties to your home country. Keep copies of all submissions until your new permit arrives.
Common Reasons for Visa Refusals
Many applications face unexpected rejections due to overlooked details. IRCC data shows that incomplete supporting documents and unclear travel intent top the refusal list. Addressing these early boosts approval odds.
How to Avoid Application Pitfalls
Top 5 refusal reasons and fixes:
- Insufficient funds: Show 6 months of bank statements with consistent balances.
- Weak ties to home country: Provide employment contracts or property deeds.
- Dual intent concerns: Clarify return plans if studying or working temporarily.
- Incomplete forms: Use IRCC’s online validator before submitting.
- Past refusals undisclosed: Always declare prior rejections honestly.
Request GCMS notes if refused. These reveal officer comments for targeted reapplications.
Reapplying After a Refusal
Wait 30–60 days to reapply, unless addressing urgent errors. Success rates jump when you:
- Submit new evidence (e.g., stronger financial proofs).
- Include a procedural fairness letter explaining corrections.
- Consult an immigration lawyer for complex cases.
“Reapplications with GCMS notes resolve 68% of previous issues,” notes an immigration consultant.
Template reconsideration requests should cite updated documents and policy compliance.
Conclusion
A smooth journey begins with thorough preparation and accurate paperwork. Double-check your passport validity, photos, and fee receipts to meet all requirements.
Submit early to account for processing delays. Use the IRCC portal for updates or additional help. Once approved, consider travel insurance for unexpected events.
Review cultural norms to blend seamlessly during your stay. Your complete document checklist ensures confidence from application to arrival.
Safe travels—your adventure starts with a well-prepared travel authorization process!


